HOW TO BUILD A RAISED BED
Raised beds can be made from many materials (see our picture gallery of raised beds) but wood is the commonest. Below we show you how we built our basic raised bed from wood. All the materials are commonly available from local stores.
One word first about wood / lumber / timber. If wood is to last a long time outdoors it should be treated. Whilst all wood will eventually rot, treated wood will last many years longer. There are concerns over the use of treated wood for raised bed. I suggest that you trawl the internet and come to your own conclusions.
For our beds we are using new tanalised wood, which we believe is safe. The process of tanalising previously used arsenic and chrome but no longer. These days it’s copper based which is much safer. Indeed, copper based fungicide is often sprayed directly onto plant leaves.
Our raised bed will be 1.8m (6ft) square. Yours can be longer if you want but don’t make it much wider. 1.8m (6ft) wide allows you to reach the centre of the bed without too much of a problem.
See our note (construction methods) at the end of this article about why we recommend part constructing the frame in the raised bed area. We also strongly suggest that you read this entire article before starting any construction work.
Wood and tools needed:
1. Four 1.8m x 15cm (6ft x 6in) treated wood. Gravel boards (they form the base of some fences) will do the job well. See point 1 at the end of this article if you want a higher raised bed.
2. One fence post or similar wood measuring 1.8m x 10cm x 10cm (6ftx 4in x 4in). See point 1 at the end of this article if you want a higher raised bed.
3. Sixteen exterior nails, about 7cm (3in) long
4. Four canes and some string to mark out the bed
Spirit level (not absolutely essential)
Saw and hammer
Spade
Tape measure
5. Compost and soil to top up the raised bed.
How to build the raised bed:
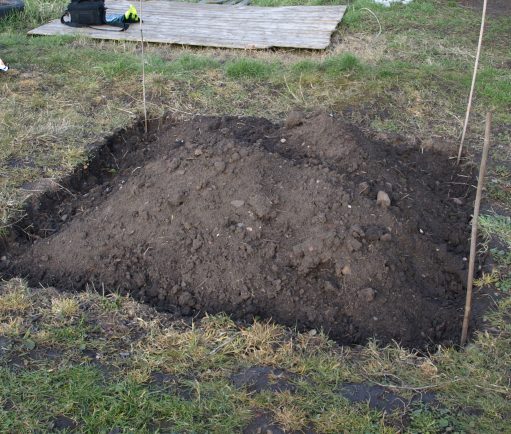
1. Mark out the raised bed area using the canes and string.
Check that the marked out area is perfectly square by measuring the distance between the two opposite diagonals. The two distances should be the same.
In the diagram, the line AA should be the same length as line BB. This applies to rectangular and square shaped beds.

Clear the area of weeds and at the same time dig it to a spade’s depth. This will increase the volume of the soil which should be piled up in the centre of the area.
Make sure that there is an area at each corner clear of soil to a depth of 30cm (1ft). This is where the corner posts will go.
2. Saw the wood
If the gravel boards are not the correct length then saw them to the correct length. For our 1.8m (6ft) square raised bed, each gravel board should be cut to 1.8m (6ft) long.
Saw the fence post into four lengths, each 45cm long.
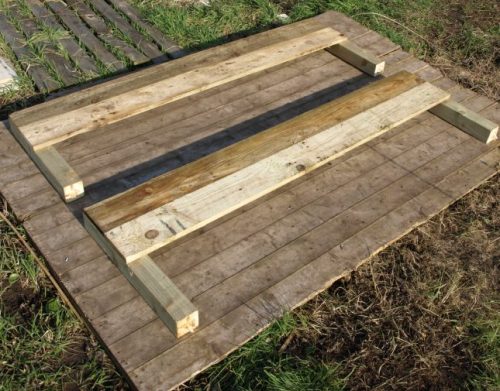
3. You will need some open, reasonably level grass area or other flat surface to build the frame.
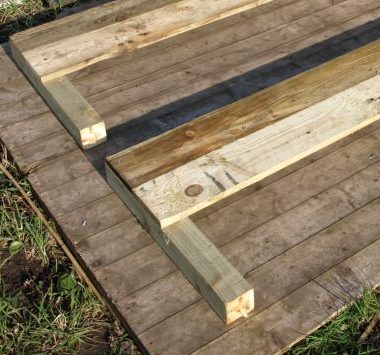
Nail posts at either end of one length (one of the shorter ones if the raised bed is not square) of gravel board. Do the same with the another length of gravel board.
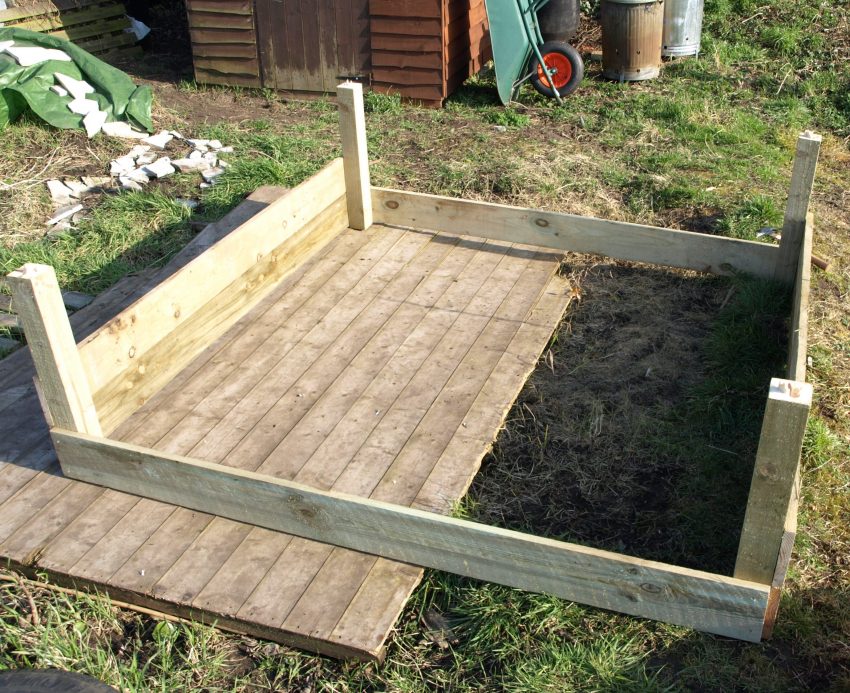
4. Position and complete
Position both assembled ends of the frame in the raised bed area. Ensure that the four corners form a square by measuring the diagonal distances as show in step 1 above. The “legs” go into the previously dug holes at each of the four corners. Tap down or add earth to ensure that both ends are level and that the base of the gravel boards is about 1½cm (¾in) below ground level.
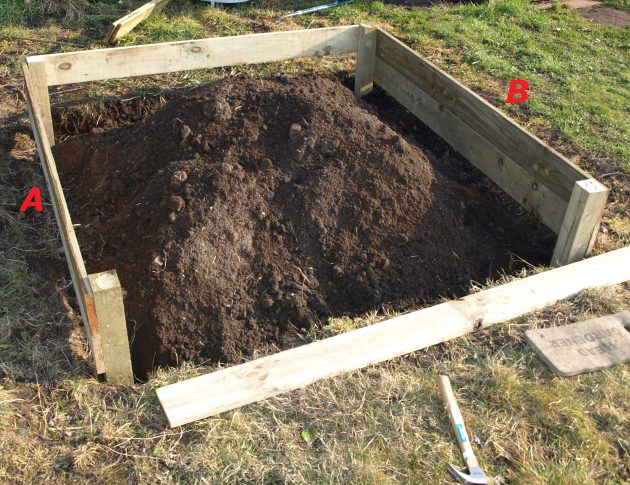
Nail the remaining two boards to each end of the frame. Again, ensure they are level and the base of the gravel boards is about 1½cm (¾in) below ground level.
Fill in the post holes with earth and gently firm down the surrounding soil with your boots.
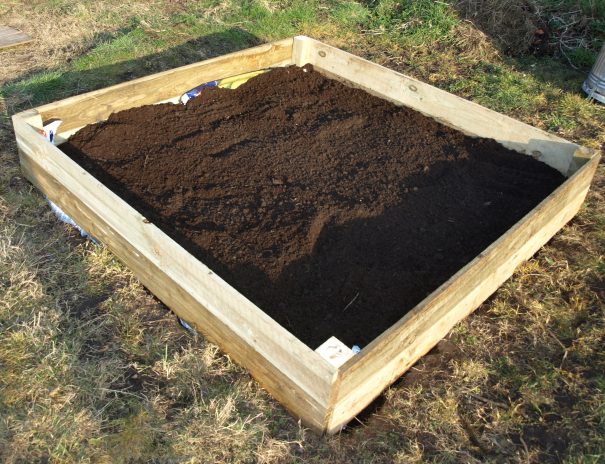
Add some multipurpose compost to the soil in the raised bed and mix it in well. Level off the surface with a rake. We estimate that if the gravel boards are 4cm (6in) high then you will need around 200 litres of extra compost. Make a surround of about 45cm (18in) around the edge of the raised bed using chipped bark or similar.
This will make walking and kneeling around the bed easier. It will also suppress weeds.
NOTES ON BUILDING RAISED BEDS
1. Height of the Raised Bed Sides
If you want your raised bed to be higher then simply add more rows of gravel boards. The picture on the right shows two rows of gravel boards adding an additional 10cm (4in) to the height.
Remember though, the side posts will need to be 10cm (4in) longer for each additional row of gravel boards.
2. Method of Construction
When scanning various books and internet sites we noticed that some recommend constructing the entire frame first then lifting it into the raised bed area. We tried that and our advice is don’t do it!
There is no doubt at all that the frame will break if a single person attempts to lift it into place. It really requires four people to lift it into place for no clear benefit over the method we suggest above.
Constructing the entire frame first. Not a good idea!
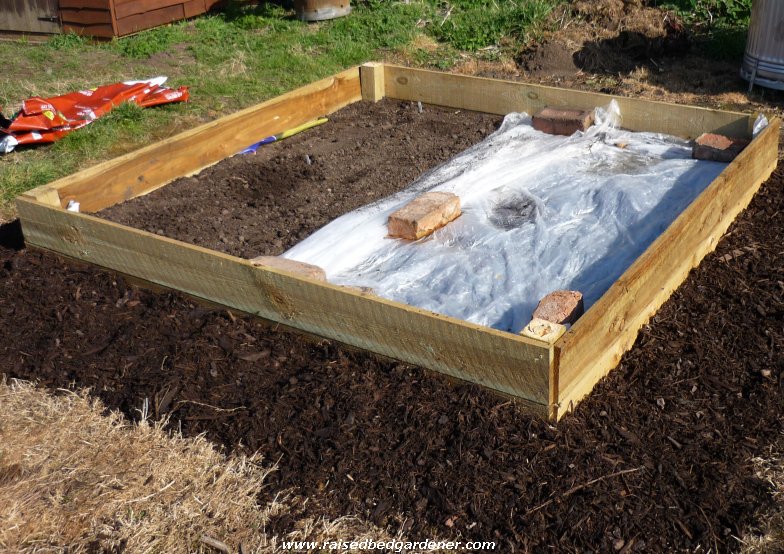
3. Covering the Top
If you plan to grow low height plants (e.g. strawberries) or if you want some frost protection at the start of the season then covering the top with some form of clear plastic or horticultural fleece is an easy option. You will need at least two levels of gravel board but only fill with soil to the first level.
Then cover the top with clear plastic or horticultural fleece. We used corrugated plastic. It can easily be attached to the corner posts.
PREVENTING CATS ON RAISED BEDS
Cats can be a real problem for the raised bed gardener. Not only do they dig large holes in your freshly dug raised bed but they poo and wee in them making your produce an unappetising choice!
One common prevention method is to lay
horticultural fleece over the top of your crops – see “Covering the Top” above.
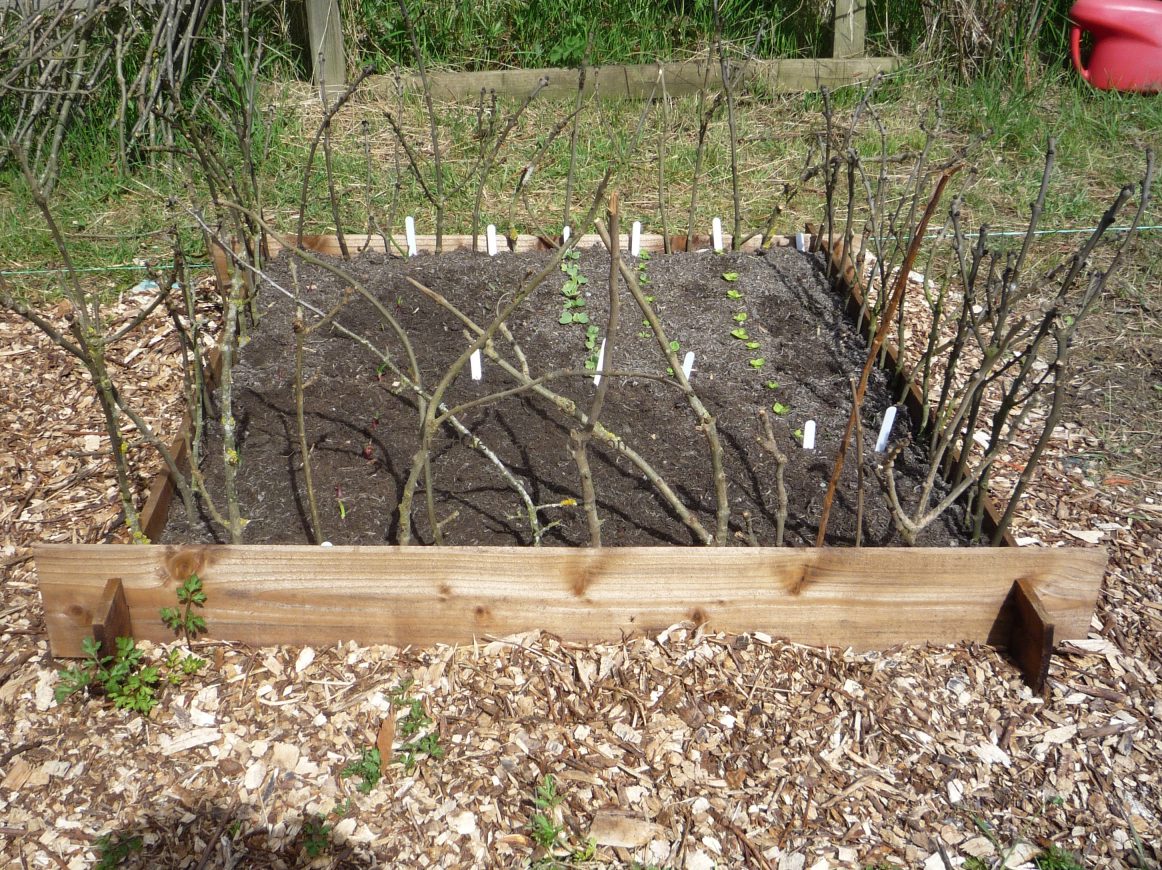
A much cheaper option, free in fact, which works well for us is to put twigs into the soil around the edge of the raised bed. Click the above picture to see a larger version of it. It seems that this is just enough to prevent the cats from getting to the raised bed.
READER COMMENTS AND QUESTIONS ABOUT THIS PAGE
OUR ANSWER: They are OK following the lie of the land. You may need to top up with compost more often as the water drains downwards but it should be easily managed.
OUR ANSWER: I agree, let the water drain through. There are not many veg which like waterlogged ground. Also, on a level situation you would normally let the water drain down so I think being on a slop is not really much different. You may loose some of the soil gradually but simply top up as required.
OUR ANSWER: I have seen suggestions that lining a raised bed with cardboard is a solution, but this is clearly not true.
The only safe solution is to have a raised bed on legs, there are several different types for sale and I’m sure they will give you some ideas. Pallets (often available for free) could also be used as a base to raise a raised bed off the soil.
ADD YOUR COMMENT OR QUESTION BELOW ABOUT THIS PAGE. IT WILL BE ADDED ABOVE WITHIN 12 HOURS
Click one Rating Below To Rate this Page: